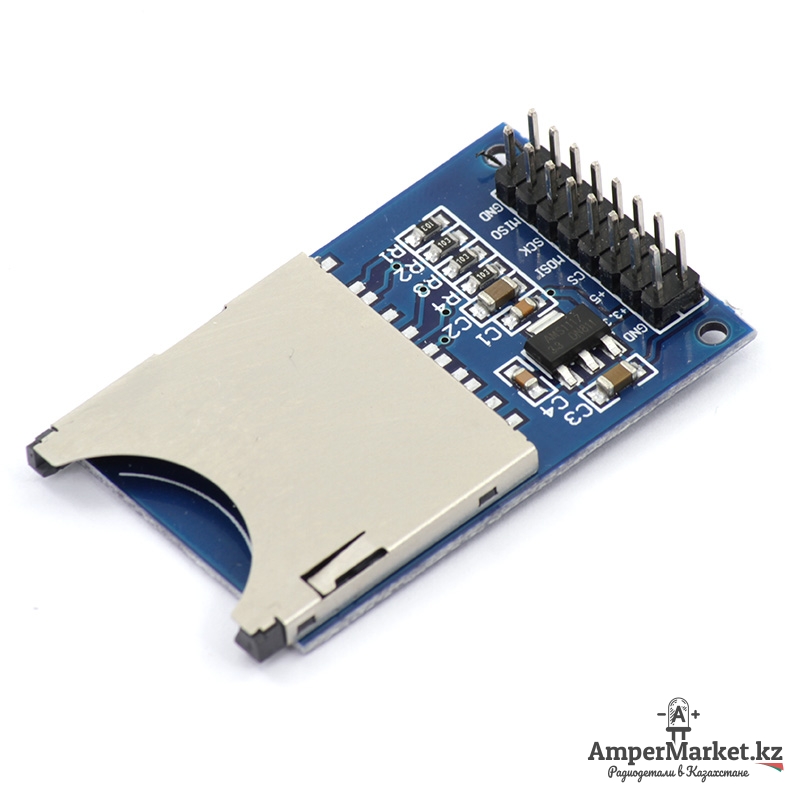
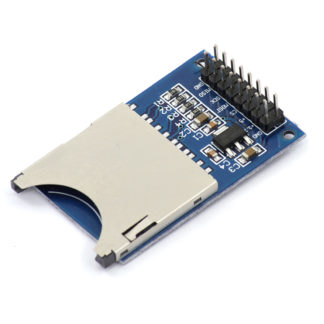
Простой в использовании и исполнении модуль-картридер, позволяющий вам записывать данные и читать их с карты памяти формата SD. Работа с модулем осуществляется по интерфейсу SPI. Модуль одинаково хорошо работает как с напряжением 3,3 В, так и 5 В, а это значит, что его можно подключать напрямую к Arduino-совместимым платам. Данный модуль может пригодиться в проектах, в которых нужно хранить какие-либо большие массивы данных, записывать данные на съемные носители или обрабатывать уже ранее записанные.
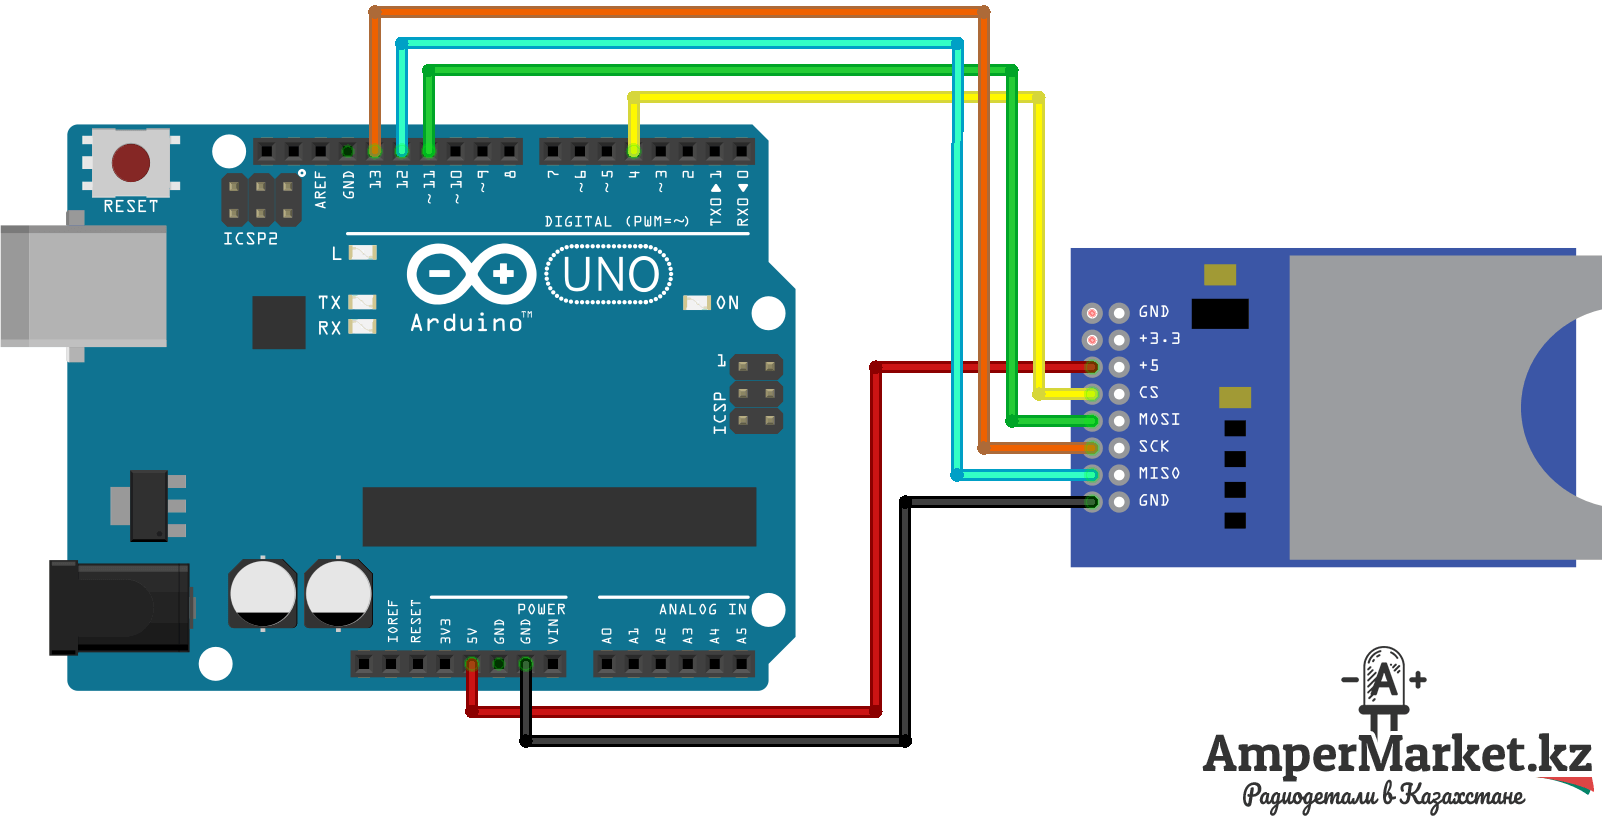
Для работы с модулем подойдет стандартная библиотека Arduino – SD.h .
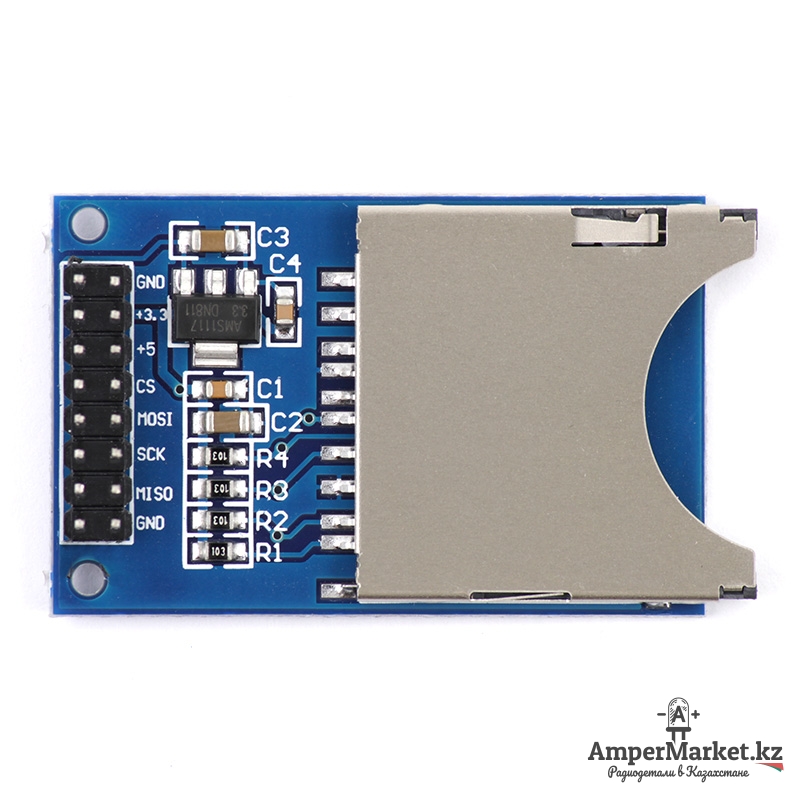
Контактная группа модуля:
- +3.3 – питание, 3,3 В
- +5 – питание, 5 В
- GND – питание, «земля»
- CS — Chip Select — выбор ведомого (SPI)
- SCK — Serial Clock — тактовый сигнал (SPI)
- MOSI — Master Output Slave Input — данные от ведущего к ведомому (SPI)
- MISO — Master Input Slave Output — данные от ведомого к ведущему (SPI).
Пример:

|
1 2 3 4 5 6 7 8 9 10 11 12 13 14 15 16 17 18 19 20 21 22 23 24 25 26 27 28 29 30 31 32 33 34 35 36 37 38 39 40 41 42 43 44 45 46 47 48 49 50 51 52 53 54 55 56 57 58 59 60 61 62 63 64 65 66 67 68 69 70 71 72 73 74 75 76 77 78 79 80 81 82 83 84 85 86 87 88 89 90 91 92 93 94 |
#include <SPI.h> #include <SD.h> // set up variables using the SD utility library functions: Sd2Card card; SdVolume volume; SdFile root; // change this to match your SD shield or module; // Arduino Ethernet shield: pin 4 // Adafruit SD shields and modules: pin 10 // Sparkfun SD shield: pin 8 // MKRZero SD: SDCARD_SS_PIN const int chipSelect = 4; void setup() { // Open serial communications and wait for port to open: Serial.begin(9600); while (!Serial) { ; // wait for serial port to connect. Needed for native USB port only } Serial.print("nInitializing SD card..."); // we'll use the initialization code from the utility libraries // since we're just testing if the card is working! if (!card.init(SPI_HALF_SPEED, chipSelect)) { Serial.println("initialization failed. Things to check:"); Serial.println("* is a card inserted?"); Serial.println("* is your wiring correct?"); Serial.println("* did you change the chipSelect pin to match your shield or module?"); while (1); } else { Serial.println("Wiring is correct and a card is present."); } // print the type of card Serial.println(); Serial.print("Card type: "); switch (card.type()) { case SD_CARD_TYPE_SD1: Serial.println("SD1"); break; case SD_CARD_TYPE_SD2: Serial.println("SD2"); break; case SD_CARD_TYPE_SDHC: Serial.println("SDHC"); break; default: Serial.println("Unknown"); } // Now we will try to open the 'volume'/'partition' - it should be FAT16 or FAT32 if (!volume.init(card)) { Serial.println("Could not find FAT16/FAT32 partition.nMake sure you've formatted the card"); while (1); } Serial.print("Clusters: "); Serial.println(volume.clusterCount()); Serial.print("Blocks x Cluster: "); Serial.println(volume.blocksPerCluster()); Serial.print("Total Blocks: "); Serial.println(volume.blocksPerCluster() * volume.clusterCount()); Serial.println(); // print the type and size of the first FAT-type volume uint32_t volumesize; Serial.print("Volume type is: FAT"); Serial.println(volume.fatType(), DEC); volumesize = volume.blocksPerCluster(); // clusters are collections of blocks volumesize *= volume.clusterCount(); // we'll have a lot of clusters volumesize /= 2; // SD card blocks are always 512 bytes (2 blocks are 1KB) Serial.print("Volume size (Kb): "); Serial.println(volumesize); Serial.print("Volume size (Mb): "); volumesize /= 1024; Serial.println(volumesize); Serial.print("Volume size (Gb): "); Serial.println((float)volumesize / 1024.0); Serial.println("nFiles found on the card (name, date and size in bytes): "); root.openRoot(volume); // list all files in the card with date and size root.ls(LS_R | LS_DATE | LS_SIZE); } void loop(void) { } |

